

A chandelier can arrive with every crystal intact and still be difficult to reinstall. Missing connectors, mixed-up drops or an unsuitable ceiling fixing can leave it packed away long after the furniture is in place.
Chandelier removal during a villa move needs electrical isolation, careful documentation and a checked installation point at the new property. For a move in Ras Al Khaimah, planning these tasks together helps prevent damage and installation delays. This guide covers component labelling, crystal packing, frame protection and the handover between movers and the electrician.
How Is a Chandelier Removed and Reinstalled During a Move?
A chandelier is transferred by a coordinated team: an electrician isolates and disconnects it, specialists document and pack removable components, and installers check the destination support before reassembly, reconnection and testing.
The work follows six stages:
- Survey both locations. Check the chandelier’s dimensions, weight, ceiling height and proposed installation point.
- Document its condition. Photograph the complete fitting, decorative arrangement and existing damage.
- Isolate and disconnect it. Have a qualified electrician make the electrical work area safe.
- Dismantle and pack it. Remove only components designed for removal, using a numbered inventory.
- Protect and transport it. Support the frame and keep wrapped decorative parts separated.
- Install and inspect it. Confirm the ceiling support, reassemble according to the fitting’s instructions, and complete electrical testing.
The precise dismantling order depends on the design. Some chandeliers allow crystal removal while the frame remains securely mounted. Others need a different support and lowering arrangement.
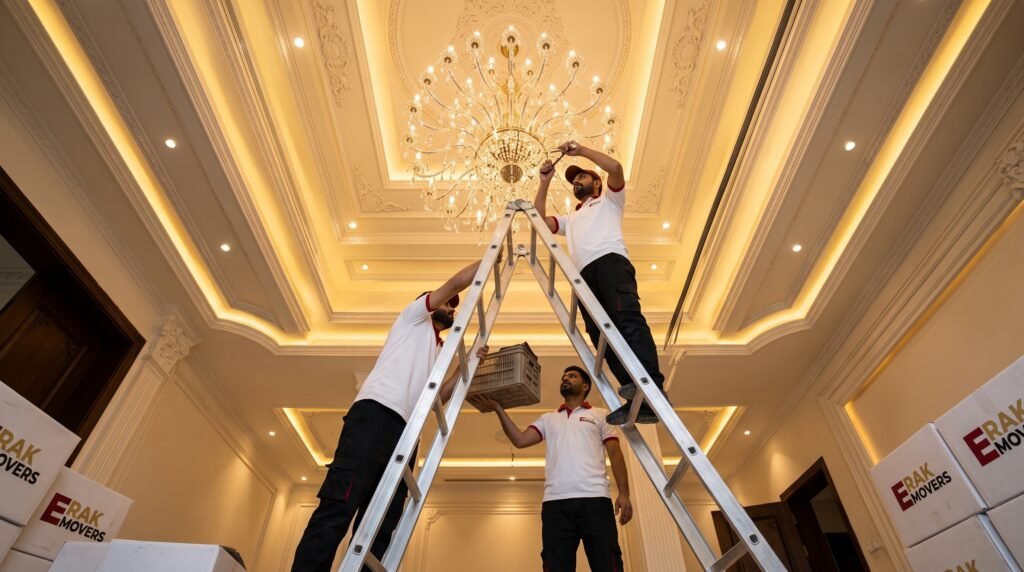
For a double-height villa entrance, assess the access equipment before booking removal. A household stepladder may not provide a suitable working position, especially when the installer needs both hands.
Why Must Electrical Isolation Happen First?
Electrical isolation must happen before disconnection or dismantling work that could expose electrical parts. Switching the chandelier off at its wall switch is not proof that the wiring is safe to handle.
A qualified electrician should identify and isolate the relevant supply, prevent unintended re-energisation and verify that the work area is electrically safe. These checks belong to the electrician, not the moving crew or homeowner.
Mechanical support requires separate attention. Electrical cables must never carry the chandelier’s weight while mounting hardware is released. The fitting needs a planned support arrangement throughout disconnection and lowering.
Before the appointment, tell the electrician about three features where present:
- Dimming controls, including wall-mounted dimmers.
- Electronic components, such as LED drivers or remote-control receivers.
- Additional equipment, including a motorised chandelier lift.
After removal, the electrician should leave the remaining installation safely terminated and enclosed. Loose wires should not be left exposed while packing continues.
Keep the space beneath the chandelier clear. Movers carrying cartons should not pass through an area where overhead work is taking place.
How Are Chandelier Components Inventoried?
Each removable pendant, arm and decorative assembly should be photographed in position and assigned an identifier before removal. That identifier must follow the component into its protective packaging.
Start with photographs of the complete chandelier from several angles. Add close-ups of each tier, connection and unusual detail. A single photograph from below rarely shows enough information for accurate reassembly.
Use a Position-Based Numbering System
Choose one fixed reference point, mark it on a sketch and number positions consistently around the fitting. Identify separate tiers so similar-looking components do not become mixed.
For example, an upper-tier drop might be labelled U-01, while a lower-tier drop is L-01. The label should go on the protective sleeve or compartment rather than directly on a delicate finish.
A simple inventory can record:
| Component ID | Original position | Condition before removal | Packed location |
|---|---|---|---|
| U-01 | Upper tier, position 1 | No visible damage | Box A, compartment 1 |
| L-01 | Lower tier, position 1 | Small existing edge chip | Box B, compartment 1 |
| A-01 | Arm at marked reference point | No visible damage | Frame crate, separate support |
These are example entries, not a prescribed numbering system.
Keep Matching Hardware Together
Place removable connectors and fasteners in labelled packets linked to their components. Do not put all small fittings into one unmarked bag.
Check the physical count against the inventory before sealing each box. Keep a digital copy of the photographs and list accessible for the destination team.
How Are Crystal Drops Wrapped and Compartmented?
Crystal drops should be wrapped individually and placed in separate cushioned compartments to prevent contact during transport. Filling a box with loose crystals and adding padding on top does not provide that separation.
Inspect each piece before wrapping. Record chips, damaged attachment points and missing connectors so they are not confused with transport damage.
Use four packing steps:
- Wrap each piece separately. Choose clean, non-abrasive material suitable for its surface and finish.
- Protect projecting details. Cushion hooks, points and narrow sections without forcing them into a tight package.
- Separate the pieces. Use compartments sized to stop neighbouring crystals from touching.
- Label and check the box. Record its contents and confirm that pieces cannot move freely inside.
Do not pull apart permanently connected bead strands or glued assemblies. Support them as assemblies unless the manufacturer’s instructions provide another method.
Keep heavy metal components away from crystal packaging. A loose bracket inside the same box can damage several pieces even when each has been wrapped.
Avoid unnecessary cleaning during removal. Cleaning products or polishing methods may be unsuitable for coatings, antique finishes or decorative details. Ask the manufacturer or a specialist when the material is uncertain.
How Is the Chandelier Frame Crated for Transport?
The chandelier frame should be supported inside a suitable crate or protective structure so its weight does not rest on decorative arms, lamp holders or fragile projections.
A large, irregular or valuable fitting may require a custom crate. Its design should account for the frame’s weight, approved support points and transport orientation. Foam lining alone does not prevent a poorly supported frame from moving.
The packing team should establish three things:
- Where the frame can bear weight without deforming.
- Which components must remain clear of the crate walls.
- How the frame will be restrained during braking and handling.
Do not suspend the chandelier from its decorative chain inside an improvised box. A transport suspension system requires a design appropriate for the load.
Any removable parts travelling inside the crate need their own secured compartments. They should not sit loose beneath the frame.
For complex fittings, discuss the crate and inventory method with fragile item movers before removal begins. The packaging needs to be ready when the chandelier comes down.
Measure the finished crate against doorways and vehicle access too. Packing can make an otherwise manageable fitting considerably larger.
How Is Reinstallation Sequenced at the Destination?
Reinstallation follows the documented component arrangement, but only after the destination’s electrical connection and structural support have been checked. Reversing the removal sequence alone is not enough.
Check the Ceiling Support
The existing light point may have supported a much lighter fitting. A decorative ceiling rose, plasterboard surface or previously installed hook does not establish that the support is suitable.
Have a competent installer assess the mounting arrangement. A heavy chandelier may require structural input and an appropriate fixing design.
Confirm the hanging position and drop before lifting. Check clearance around doors, stairs, furniture and normal walking routes.
Inspect the Delivered Components
Open the packaging in a clear, protected area. Compare the contents against the inventory and inspect the frame, connectors and decorative pieces.
Raise missing or damaged components before installation proceeds. Improvised replacement fasteners may not suit the fitting.
Mount, Connect and Reassemble
The installer should follow the manufacturer’s sequence for support, mounting and component assembly. The electrician handles reconnection and electrical checks.
Some fittings need decorative components installed before mounting. Others are dressed after the frame is secured. The original instructions take priority over a generic sequence.
Complete the Handover
Check stability, component arrangement and operation. Keep the inventory, photographs and any installation documentation with the household records.
Do not assume that illumination alone proves the installation is complete or safe.
Who Should Perform the Electrical Work?
A qualified electrician should perform electrical isolation, disconnection, reconnection and testing. The moving team handles the agreed packing and transport tasks unless it separately provides appropriately qualified electrical personnel.
Confirm responsibility for each part of the job:
| Task | Responsible specialist |
|---|---|
| Electrical isolation and reconnection | Qualified electrician |
| Component documentation and packing | Experienced chandelier handlers or fragile-item movers |
| Ceiling support assessment | Competent installer, with structural input where needed |
| Transport and delivery | Moving team with suitable packaging and restraint |
| Final electrical testing | Qualified electrician |
Ask whether electrical work, access equipment, crating and reinstallation are included in the written quote. “Chandelier moving” does not automatically include all four.
Also agree who will make good the old ceiling and whether the new property needs preparation before delivery.
Prepare the New Ceiling Before Removing the Chandelier
The best time to discover an unsuitable mounting point is before the chandelier leaves the old villa. Check the destination, arrange the electrician and prepare the inventory and packaging first.
For your Ras Al Khaimah villa move, send RAK E Movers photographs of the chandelier, its ceiling position and the proposed destination. Include the dimensions, available manufacturer details and any known weight information.
Request a written scope covering removal coordination, packing, transport and reinstallation responsibilities. A documented handover gives the destination team the information it needs to put every component back where it belongs.